
Advanced Tuck Back Lever
How to do Advanced Tuck Back Lever?
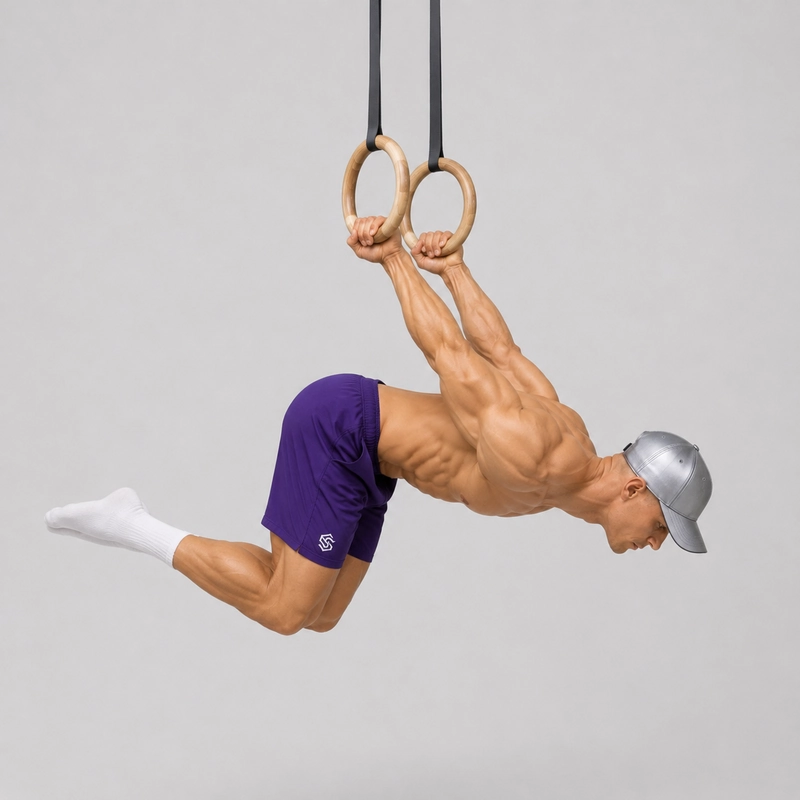
The advanced tuck back lever, sometimes called the open tuck back lever, is a static pulling exercise performed with straight arms on a pull-up bar or gymnastics rings. Your torso remains approximately horizontal while your hips open and your bent knees move farther away from your chest.
This position is more demanding than the Tucked Back Lever because moving the knees away from your body creates a longer lever. However, it remains more manageable than the One-Leg Back Lever and the full Back Lever.
The advanced tuck should look visibly more open than a tight tuck. Your thighs extend away from your torso while your hips and knees remain bent. Do not confuse it with a half-lay back lever, where the hips are fully extended in line with the torso and only the knees remain bent.
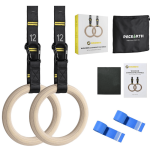
You can practice the exercise on a stable pull-up bar or on gymnastics rings. A bar provides a fixed grip, whereas rings can rotate and move independently, increasing the stabilization demand. See our guides to the best pull-up bars for calisthenics and gymnastics rings when choosing equipment.
The advanced tuck is an important bridge between compact and extended back lever positions. A gradual progression from the tuck into increasingly open shapes is also recommended in this back lever progression guide.
How to Do the Advanced Tuck Back Lever
Equipment and Setup
Use a secure pull-up bar or a properly mounted pair of gymnastics rings. Make sure there is enough space behind and beneath you to enter and exit the position without hitting the floor or nearby equipment. Complete a general warm-up followed by shoulder, elbow and wrist preparation. The Joint Warm-Up Routine can be used before moving into exercise-specific preparation. You should already be comfortable with the Skin the Cat and able to hold a controlled Tucked Back Lever. When training on rings, familiarity with the Inverted Hang on Rings is also recommended.
Step-by-Step Instructions
- Grip the bar slightly wider than shoulder width using the grip you have already developed during easier back lever progressions. On rings, allow the rings to rotate naturally without losing control.
- Pull your knees toward your chest and rotate backward into a controlled inverted tuck position. You can use a slow Skin the Cat entry if you are comfortable with the movement.
- Straighten your elbows completely and maintain active pressure through both hands.
- Draw your shoulders away from your ears and keep your upper back broad rather than allowing your shoulder girdle to collapse passively.
- Begin in a compact tucked back lever with your knees close to your chest.
- Slowly open your hips and move your knees farther away from your torso while keeping both knees bent at approximately 90 degrees.
- Lower your shoulders, torso and hips together until your torso is approximately parallel to the floor.
- Brace your abdominals, squeeze your glutes and keep the position symmetrical from side to side.
- Hold the advanced tuck without swinging, bending your elbows or allowing your hips to drop.
- To exit, bring your knees back toward your chest and return to a controlled inverted tuck before lowering safely.
Advanced Tuck Back Lever Completion Standard
- Your elbows remain fully extended throughout the hold.
- Your torso is face down and approximately parallel to the floor.
- Your knees are visibly farther from your chest than in a tight tucked back lever.
- Your hips and knees remain bent, distinguishing the position from a half-lay back lever.
- Your shoulders and hips remain level without twisting to either side.
- Your body remains still, with no kicking or swinging used to maintain the position.
- You enter and leave the hold under control.
Common Mistakes
- Remaining in a tight tuck: Move your knees farther from your chest so the progression creates meaningfully greater leverage.
- Accidentally performing a half-lay: Keep your hips flexed instead of extending your thighs completely in line with your torso.
- Bending the elbows: Reduce the leverage until you can maintain straight arms throughout the hold.
- Shrugging the shoulders: Maintain active shoulders and create space between your shoulders and ears.
- Letting the chest collapse: Keep your upper back broad and your shoulder position controlled.
- Allowing the hips to sag: Brace your core and reduce how far you move your knees away from your body.
- Opening the legs unevenly: Keep both knees at the same distance from your torso.
- Dropping into the hold: Lower gradually so your shoulders and elbows are not suddenly loaded.
- Changing grip without preparation: Develop a new grip in easier progressions before using it for advanced tuck holds.
- Training through joint pain: Stop if you experience sharp shoulder, elbow or biceps pain.
Benefits of the Advanced Tuck Back Lever
- Provides a gradual leverage increase after the tucked back lever.
- Builds straight-arm strength for harder back lever variations.
- Develops shoulder control in an extended-arm position.
- Strengthens the chest, shoulders, arms, back and core simultaneously.
- Uses a symmetrical body position before progressing to unilateral variations.
- Improves body-line awareness and total-body tension.
- Develops controlled entries and exits for back lever training.
Readiness and Safety
Before attempting this progression, build a stable Tucked Back Lever with straight elbows and a controlled exit. You should also possess sufficient shoulder mobility to move through the required range without pain. Use a low bar or appropriately adjusted rings with a mat underneath whenever possible. Inspect the equipment before every session and avoid training above obstacles. The shoulders experience substantial forces during gymnastics-style straight-arm skills. Progress gradually and stop the exercise if you feel sharp pain, instability, numbness or tingling. For additional background on shoulder demands in gymnastics, see this sports-medicine review of the gymnastics shoulder.
Frequently Asked Questions
How far should my knees be from my chest?
Move your knees far enough away that the position looks clearly more open than a tight tuck, but not so far that your hips extend into a half-lay. Your thighs will generally project away from your torso while your hips and knees remain bent. Your exact joint angles may vary slightly according to your proportions.
What is the difference between a tucked and advanced tuck back lever?
In a regular Tucked Back Lever, the knees remain close to the chest. In an advanced tuck, the hips are opened and the knees move farther away, creating a longer and more difficult lever.
What is the difference between an advanced tuck and a half-lay back lever?
The advanced tuck retains noticeable hip flexion, so the thighs are not fully aligned with the torso. In a half-lay back lever, the hips are extended and the thighs align with the torso while the knees remain bent.
Is the advanced tuck easier than the one-leg back lever?
For most athletes, yes. The advanced tuck uses a symmetrical bent-leg position and is normally practiced before the One-Leg Back Lever.
Can I perform the advanced tuck back lever on rings?
Yes. The same basic body position can be performed on rings, although the moving handles increase the stabilization requirement. Use the Inverted Hang on Rings and Ring Skin the Cat to develop ring-specific control.
How long should I hold the advanced tuck back lever?
Start with three to five sets of approximately three to eight seconds, resting two to three minutes between demanding sets. End each hold when your elbows bend, your hips drop or you can no longer control the position.
Why do my hips keep dropping?
Your current knee position may create more leverage than you can control. Bring your knees slightly closer to your chest, reinforce your abdominal and glute tension, and progress outward in smaller increments.
What comes after the advanced tuck back lever?
Gradually increase the distance between your knees and chest before progressing to the One-Leg Back Lever, half-lay or straddle variations. These positions eventually prepare you for the full Back Lever.
Tips for the proper execution of Advanced Tuck Back Lever
Straighten your elbows before lowering into the advanced tuck position.
Move your knees away from your chest gradually instead of opening your hips all at once.
Keep both knees equally far from your torso to prevent rotation.
Maintain active shoulders rather than hanging passively from the joints.
Keep your upper back broad without forcing an exaggerated shoulder position.
Brace your abdominals before increasing the length of the lever.
Squeeze your glutes to help prevent your hips from dropping.
Keep your head neutral and avoid lifting your chin to look forward.
Lower your shoulders, torso and hips as one controlled unit.
Use calm breaths instead of holding your breath for the entire set.
Record a side-view video to check whether your torso is horizontal.
End the set as soon as your elbows bend or your body line changes.
Return to an inverted tuck before lowering from the apparatus.
Use identical grip placement on every set so you can measure progress consistently.
Muscles worked when doing Advanced Tuck Back Lever
The advanced tuck back lever is a compound isometric exercise that requires the upper body and trunk to work together. The shoulders, chest and arms help maintain the straight-arm connection to the apparatus, while the back and core stabilize the torso against gravity.
Primary Muscles
- Anterior deltoids: Help control the shoulder while the arms remain extended behind the body.
- Pectoralis major: Contributes to shoulder stability and force production throughout the hold. Learn more about its structure and actions in this NCBI anatomy overview of the pectoralis major.
- Biceps brachii: Works isometrically across the shoulder and elbow while the arms remain straight. See this NCBI overview of biceps anatomy.
Secondary Muscles
- Latissimus dorsi and teres major: Assist with shoulder control and stabilization.
- Trapezius and rhomboids: Stabilize the shoulder blades and upper back.
- Rectus abdominis and obliques: Resist excessive spinal extension and unwanted rotation.
- Spinal erectors: Help maintain a stable torso position.
- Gluteus maximus: Supports hip control and prevents the pelvis from sagging.
- Forearms and grip muscles: Maintain a secure connection to the bar or rings.
Because the knees move farther from the torso, the advanced tuck places greater leverage on these muscles than the Tucked Back Lever. It should nevertheless remain controlled before progressing to the One-Leg Back Lever or full Back Lever.
Primary Muscle(s):

Anterior delt

Middle chest
Secondary Muscle(s):

Biceps
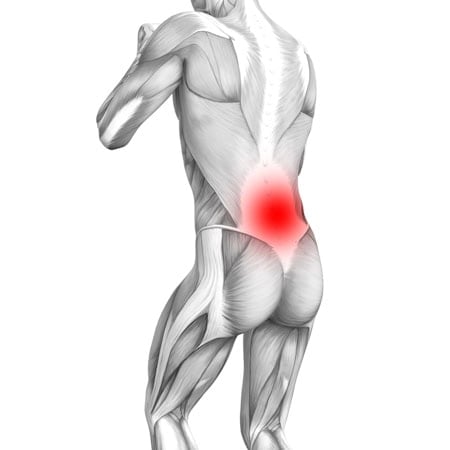
Lower back
Equipment needed for Advanced Tuck Back Lever
Adjust the difficulty of Advanced Tuck Back Lever
How to make Advanced Tuck Back Lever harder?
How to make Advanced Tuck Back Lever easier?
How to make Advanced Tuck Back Lever harder?
To make Advanced Tuck Back Lever harder:
-
Move your knees progressively farther away from your chest.
-
Open your hips further while preserving straight elbows and level hips.
-
Increase your total accumulation of technically correct hold time.
-
Perform controlled advanced tuck back lever negatives.
-
Raise from a lower position into the advanced tuck without using momentum.
-
Progress to a one-leg back lever by extending one leg at a time.
-
Progress to a half-lay back lever by extending the hips while keeping the knees bent.
-
Progress to a straddle back lever before bringing the legs together in a full back lever.
How to make Advanced Tuck Back Lever easier?
To make Advanced Tuck Back Lever easier:
-
Keep your knees closer to your chest in a tight tucked back lever.
-
Move only one or two centimeters beyond your current tuck position.
-
Practice the advanced tuck with your torso slightly above horizontal.
-
Use a resistance band to reduce the load while learning the body position.
-
Ask a qualified training partner to support your hips lightly.
-
Perform short controlled holds instead of extending a fatigued set.
-
Alternate advanced tuck attempts with technically clean tucked back lever holds.
