
Straddle Back Lever
How to do Straddle Back Lever?
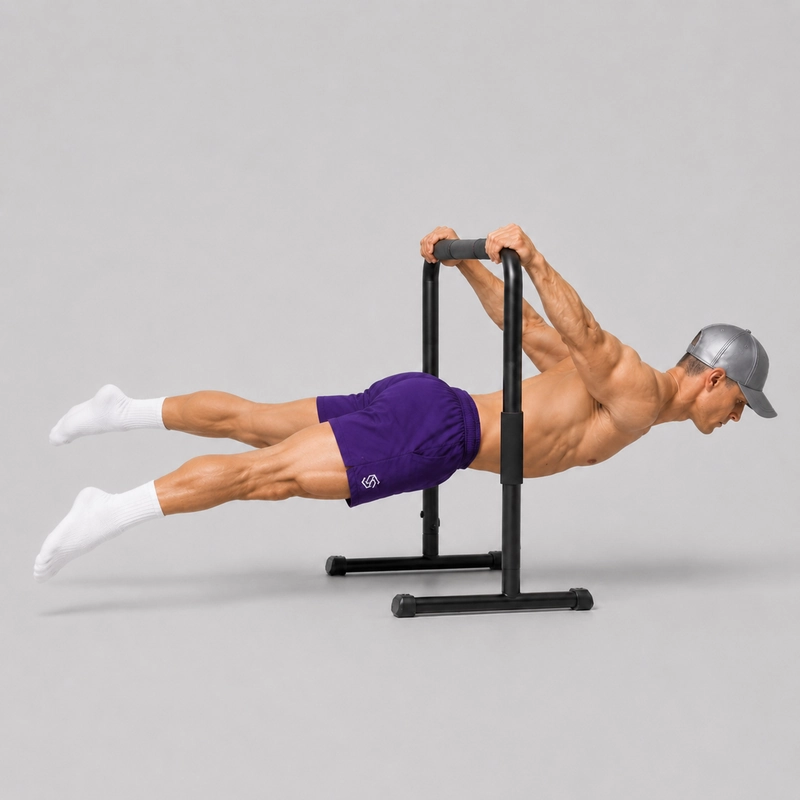
The straddle back lever is an advanced straight-arm calisthenics hold in which you suspend your body face down and approximately parallel to the ground while spreading your straight legs into a wide V. The straddle shortens the effective lever compared with the full back lever, making the horizontal position more manageable while still requiring considerably more strength than compact back lever variations.
This exercise fits between the tucked back lever and the full back lever progression. Many athletes first develop an advanced tuck and a controlled one-leg back lever before extending both knees into the straddle position. In competitive gymnastics, the back lever is recognized as a straight-arm strength and hold element in the World Gymnastics Men’s Artistic Code of Points; the straddle version described here is primarily used as a progression toward that complete position.
The demonstrated variation is performed on high, stable dip bars. If you are choosing equipment for this setup, our dip bar guide compares portable, wall-mounted, and rack-mounted options. The same essential body position can also be performed on a sufficiently high pull-up bar, parallel rails, stall bars, or gymnastics rings. Rings move independently and allow the hands to rotate, increasing the stabilization demands, but the movement does not need a separate canonical exercise page.
The straddle back lever places substantial straight-arm loading on the shoulders, elbows, and biceps. Research specifically examining this individual progression is limited, but the broader sports-medicine literature on the gymnastics shoulder describes the high repetitive forces involved in gymnastics strength and support work. Develop the exercise gradually, use a grip you have already trained through easier progressions, and stop if you experience sharp pain or a sudden pulling sensation.
How to Do the Straddle Back Lever
Equipment and Setup
You can perform the straddle back lever on high dip bars, parallel rails, a fixed pull-up bar, stall bars, or gymnastics rings. The apparatus must be firmly anchored, offer enough clearance for your entire body, and remain stable when pulled from below. Do not use lightweight portable dip bars that could lift, slide, or tip during the exercise. Place a suitable exercise mat beneath the apparatus and clear the surrounding area. Prepare your shoulders, elbows, and wrists with a gradual joint warm-up routine before beginning loaded straight-arm holds.
Step-by-Step Instructions
- Establish your grip. On parallel dip bars, hold one rail with each hand. On a single fixed bar, place both hands approximately shoulder-width apart. Use the same pronated, neutral, or naturally rotating grip that you have already developed through your easier back lever progressions.
- Enter a controlled inverted position. Tuck your knees toward your chest and rotate underneath the apparatus until your hips rise above your shoulders. This entry resembles the first part of a Skin the Cat. On rings, first become comfortable with the inverted hang and the Ring Skin the Cat.
- Pause in a stable tuck. Confirm that you can control your grip, shoulder position, and balance before extending your legs. If you cannot pause comfortably, return to the tucked back lever rather than continuing into the straddle.
- Set your upper body. Fully straighten your elbows, draw your shoulders away from your ears, and keep your upper back broad. Maintain active tension instead of hanging passively from the shoulder joints.
- Extend into a straddle. Straighten both knees and spread your legs into a wide, symmetrical V. Point your toes and actively reach both feet away from your hips.
- Brace your torso. Tighten your abdominals, control your ribs, and squeeze your glutes so your torso and pelvis remain connected. Keep both sides of your pelvis level and facing the floor.
- Lower toward horizontal. Keeping your arms straight, slowly lower your shoulders, torso, hips, and legs as one unit. Stop when your body is approximately parallel to the ground or at the lowest angle you can actively control.
- Hold the position. Maintain straight elbows, extended hips, locked knees, and an even straddle. Keep your head neutral and use controlled breaths without releasing your trunk tension.
- Exit under control. Bring your knees back toward your chest and return to the inverted tuck before stepping down. Continue into a German hang only if you have already developed that range safely through the Skin the Cat.
Completion Standard
A successful straddle back lever has straight arms, extended hips, straight knees, and a wide but actively controlled leg position. The shoulders, torso, and hips should be approximately horizontal, with both legs held at the same height and no assistance from the floor or surrounding equipment. Count only the stable portion of the hold, not the entry or the time spent above horizontal.
Common Straddle Back Lever Mistakes
- Bending the elbows: Lock your elbows before lowering and return to an easier progression if you cannot keep them straight.
- Shrugging the shoulders: Draw your shoulders away from your ears and maintain deliberate upper-body tension throughout the hold.
- Allowing the chest to collapse: Keep your upper back broad instead of letting gravity pull the shoulder blades into uncontrolled retraction.
- Sagging at the hips: Brace your abdominals and squeeze your glutes so your pelvis does not fall below your shoulders.
- Piking at the waist: Keep the hips extended rather than folding the legs forward to shorten the lever.
- Bending the knees: Contract your quadriceps and reach through your toes to preserve the straight-leg progression.
- Using an uneven straddle: Keep both knees straight, both legs at the same height, and both sides of your pelvis facing the floor.
- Forcing maximum flexibility: Use the widest straddle you can actively control instead of forcing your legs into their deepest passive split.
- Dropping into the hold: Lower slowly from the inverted position so your shoulders and elbows absorb the load progressively.
- Changing grip without preparation: Pronated, neutral, and supinated grips create different demands, so develop each grip through easier progressions before using it for a straddle hold.
- Using unstable equipment: Stop immediately if the dip bars, bar, rings, or supporting structure move unexpectedly.
Benefits of the Straddle Back Lever
- Builds toward the full back lever: Spreading the legs reduces the effective leverage while preserving a straight-leg body position.
- Develops straight-arm strength: The shoulders, chest, arms, and surrounding tissues must support the body while the elbows remain extended.
- Improves total-body tension: The upper body, trunk, glutes, and legs must work together to maintain one connected horizontal position.
- Trains active straddle control: The hip muscles must spread and stabilize the legs without sacrificing knee or pelvic alignment.
- Improves positional awareness: The exercise teaches you to recognize and correct small changes in shoulder position, hip height, and leg symmetry.
- Provides a symmetrical progression: Athletes who experience excessive rotation in the one-leg variation may find the evenly loaded straddle easier to organize.
- Transfers across equipment: The strength and body position can be developed on dip bars before being adapted to a pull-up bar or gymnastics rings.
Are You Ready for the Straddle Back Lever?
Before attempting the straddle variation, you should be able to enter and leave an inverted tuck without swinging or losing your grip. A controlled Skin the Cat, a stable tucked back lever, and familiarity with an advanced tuck provide an appropriate foundation. The one-leg back lever can be used as an additional bridge, although individual athletes may find the one-leg and straddle variations difficult in a different order. Increase the lever length gradually rather than repeatedly dropping into a position you cannot control. The biceps crosses the elbow and shoulder, as explained in the NCBI overview of biceps anatomy, which helps explain why straight-elbow back lever work can create significant tension through the upper arm. A supinated grip changes this loading further and should be introduced through easier grip-specific progressions. Train over a clear area with suitable padding and use equipment that is rated and secured for inverted loading. Stop if you experience sharp pain, numbness, tingling, sudden instability, or a pulling sensation around the shoulder, elbow, or biceps. Persistent or recurring pain should be assessed by an appropriately qualified healthcare professional.
Straddle Back Lever FAQs
Is the straddle back lever easier than the full back lever?
Yes, for most athletes. Spreading the legs reduces the effective leverage compared with holding both legs straight and together in the full back lever.
Is the straddle back lever easier than the one-leg back lever?
It depends on your proportions, strength, and active flexibility. Some athletes find the symmetrical straddle easier to control, while others progress more comfortably through the one-leg variation.
How wide should my straddle be?
Use the widest position you can maintain actively with straight knees, level hips, and equal tension through both legs. As you become stronger, gradually narrow the straddle to increase the leverage.
Can I perform a straddle back lever on dip bars?
Yes, provided the dip station is sufficiently high, firmly anchored, and stable when loaded from below. See our guide to choosing dip bars for an explanation of the differences between portable, fixed, and rack-mounted setups.
Can I perform it on a pull-up bar?
Yes. A fixed bar provides a stable setup and normally uses a pronated grip. Make sure the bar has enough clearance behind and beneath it for your entire body; our pull-up bar guide explains the main bar configurations.
Can I perform it on gymnastics rings?
Yes. Rings allow the hands to rotate naturally but require additional stabilization because each ring moves independently. Develop a controlled inverted hang on rings before lowering into a ring back lever progression.
Should the palms face forward or backward?
A pronated grip is common on a fixed bar, parallel dip bars generally create a neutral grip, and rings can rotate naturally. A supinated grip can increase the demands around the biceps and elbows, so it should not be introduced for the first time during a full straddle attempt.
How long should I hold the straddle back lever?
Begin with three to five sets of controlled three-to-eight-second holds, resting approximately two to three minutes between demanding attempts. End each hold when your elbows bend, your hips drop, or the straddle becomes uneven.
Why do my hips sag?
Sagging usually means the current leverage is too difficult or you are losing abdominal, glute, or shoulder tension. Widen the straddle, use resistance-band assistance, hold above horizontal, or return to the tucked variation.
What progression comes after the straddle back lever?
Gradually narrow the distance between your legs while preserving straight knees and the same horizontal body line. Once you can control a narrow straddle, begin working toward the full back lever.
Tips for the proper execution of Straddle Back Lever
Keep your elbows fully locked from the entry until you have safely exited the hold.
Draw your shoulders away from your ears without forcing them into an exaggerated position.
Spread your legs only as wide as you can actively control with straight knees.
Squeeze your glutes and keep your ribs down to prevent your hips from sagging.
Reach through your toes to create one long line from your shoulders to each foot.
Lower into position slowly instead of trying to catch yourself at horizontal.
Keep both sides of your pelvis level so one leg does not drift higher than the other.
Use short, high-quality holds and end the set before your elbows bend or your hips drop.
Film the exercise from the side to check whether your shoulders and hips are actually horizontal.
Practice the same grip through your easier progressions before using it for the straddle hold.
Muscles worked when doing Straddle Back Lever
The straddle back lever is a compound straight-arm isometric exercise rather than an isolated back or abdominal movement. The shoulders and arms support the lever while the torso, hips, and legs maintain the extended straddle position. Compared with the tucked back lever, extending and separating the legs substantially increases the demand on the upper body and trunk.
Primary Muscles
- Anterior deltoids: The front of the shoulders works isometrically to control the loaded shoulder-extension position and prevent the torso from rotating downward.
- Pectoralis major: The chest contributes to shoulder control and helps support the torso relative to the arms. The NCBI overview of pectoralis major anatomy explains how the muscle acts across the shoulder joint.
- Biceps brachii: The biceps remains under considerable tension while contributing to shoulder and elbow stability. Because it crosses both joints, straight-arm back lever training should be progressed gradually; see the NCBI biceps anatomy reference for further anatomical detail.
- Abdominals and obliques: The abdominal muscles keep the torso rigid, control the ribs and pelvis, and resist unwanted rotation.
Secondary and Stabilizing Muscles
- Latissimus dorsi and teres major: These muscles contribute to shoulder stability and help control the entry, hold, and exit.
- Triceps: The triceps maintains elbow extension throughout the straight-arm hold.
- Serratus anterior, trapezius, rhomboids, and rotator-cuff muscles: These muscles coordinate the shoulder blades and stabilize the shoulder joints under load.
- Forearms and hand muscles: The grip muscles maintain a secure connection to the dip bars, fixed bar, or rings.
- Spinal erectors: The lower-back muscles help maintain a rigid torso and resist folding at the hips.
- Glutes and hamstrings: These muscles extend the hips and prevent the lower body from sagging.
- Quadriceps: The quadriceps keep both knees fully extended.
- Hip abductors and adductors: These muscles create and stabilize the width and symmetry of the straddle.
Narrowing the straddle progressively increases the leverage the upper body must resist. Bringing the legs completely together produces the final full back lever position.
Primary Muscle(s):

Anterior delt
Secondary Muscle(s):
Equipment needed for Straddle Back Lever
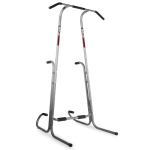
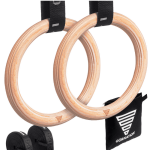
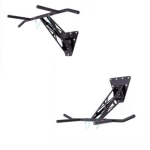
Adjust the difficulty of Straddle Back Lever
How to make Straddle Back Lever harder?
How to make Straddle Back Lever easier?
How to make Straddle Back Lever harder?
To make Straddle Back Lever harder:
-
Narrow Straddle Back Lever — Bring your legs closer together while maintaining straight knees and level hips.
-
Full Back Lever — Hold both legs straight and together while keeping the entire body horizontal.
-
Straddle Back Lever Negative — Lower very slowly from an inverted position through the horizontal straddle position.
-
Straddle Back Lever Raise — Raise your body from the horizontal straddle position toward an inverted hang without bending your arms.
-
Full Back Lever Negative — Lower with both legs together while maintaining a straight body line.
-
Back Lever Pull-Up — Add a controlled dynamic pulling action while maintaining the back lever body position.
How to make Straddle Back Lever easier?
To make Straddle Back Lever easier:
-
Tucked Back Lever — Keep both knees pulled toward your chest to create the shortest and most manageable back lever position.
-
Advanced Tuck Back Lever — Move your knees farther from your chest while keeping your hips and knees bent.
-
Band-Assisted Straddle Back Lever — Place a resistance band around your hips to reduce the load while practicing the full straddle shape.
-
Feet-Assisted Straddle Back Lever — Use light foot support to rehearse the horizontal position without carrying your full body weight.
-
Angled Straddle Back Lever — Hold your body above horizontal and gradually lower the angle as your strength improves.
-
Wide Straddle Back Lever — Increase the distance between your legs to reduce the effective leverage.
