
Pull-Up Top Hold
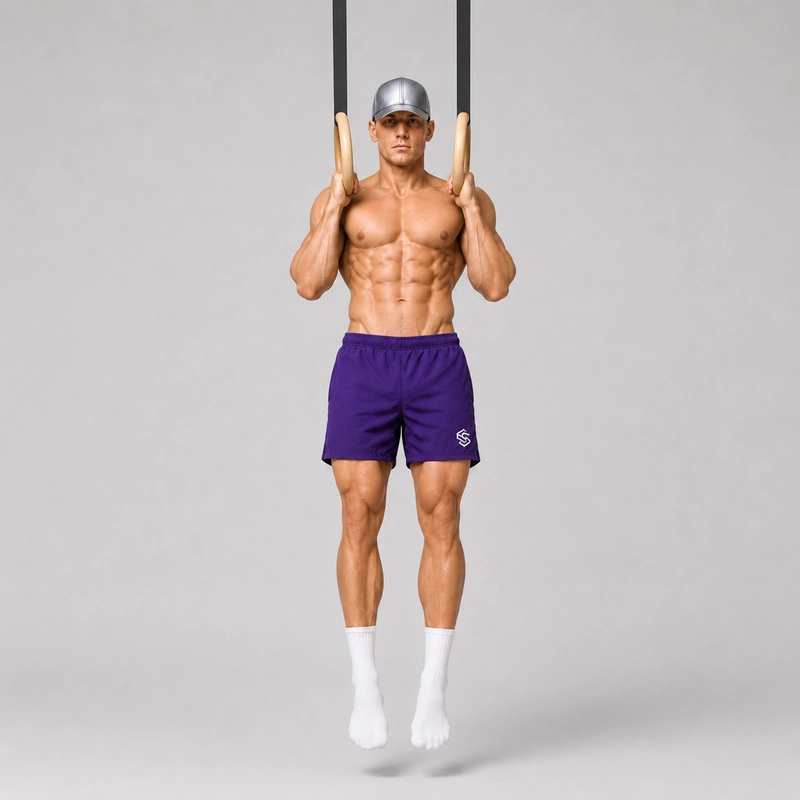
How to do Pull-Up Top Hold?
The pull-up top hold is an isometric vertical-pulling exercise in which you maintain the finished position of a pull-up without moving. On gymnastics rings, the rings remain beside the upper chest and the chin stays above the hands; on a pull-up bar, the chin remains clearly above the bar. Your feet stay off the floor, your body remains still and the back, arms and grip work continuously to prevent you from lowering.
This exercise is also known as the pull-up high hold, top-position pull-up hold, isometric pull-up hold or flexed-arm hang. “Pull-up top hold” is the clearest canonical name because it describes the exact position without creating confusion with the high pull-up, an explosive exercise in which the bar is pulled toward the lower ribs, abdomen or waist.
The pull-up top hold can help athletes strengthen the final portion of a strict pull-up, learn to finish with the entire body elevated instead of reaching with the chin, and prepare for controlled pull-up negatives. It is particularly useful for people who can pull most of the way up but consistently lose the final few centimetres.
Pull-Up Top Hold on Rings vs a Pull-Up Bar
The gymnastics-ring and fixed-bar versions should be consolidated on this page. Both train the same top-range elbow-flexion and vertical-pulling position, and both use hold duration as the main performance measure.
Rings allow each hand to rotate independently and are normally held with a neutral or slightly supinated grip at the top. They must be controlled beside the upper chest without swinging apart. A fixed bar provides a more stable target and normally uses a shoulder-width overhand grip. These equipment differences deserve separate instructions, but they do not create sufficiently different exercises or search intent to justify competing canonical pages.
The demonstration media can show the ring version while the equipment taxonomy includes both gymnastics rings and pull-up bars. This follows the approach already used for the feet-assisted pull-up, which covers both apparatuses on one page.
What Does the Pull-Up Top Hold Train?
The hold primarily develops strength and muscular endurance at the top of the pull-up, where the elbows are strongly flexed and the upper arms have been drawn toward the torso. The lats, biceps, brachialis and upper-back muscles maintain the elevated position, while the forearms secure the grip and the trunk prevents swinging.
A systematic review of isometric training found that isometric exercise can produce strength and muscular adaptations, although the result depends on factors such as joint position, muscle length, intensity and intent. Research also supports a meaningful degree of joint-angle specificity in isometric strength gains. These studies did not test ring or bar pull-up holds specifically, so the practical inference is that this exercise is best used to strengthen the top position rather than as a complete replacement for full-range pulling.
Readiness and Equipment
You do not need to be able to perform a complete pull-up because a box can be used to enter the top position. However, you should be able to support at least part of your bodyweight with bent elbows and without hand, wrist, elbow or shoulder pain. If you cannot maintain the position for several controlled seconds, use foot or band assistance.
- Attach both rings to a stable overhead structure and inspect the anchors, straps, buckles and handles before training.
- Set both rings to exactly the same height and approximately shoulder-width apart.
- Use a secure pull-up bar that will not rotate, shift or detach under your bodyweight.
- Place a stable box or platform beneath the rings or bar so you can enter and exit without jumping.
- Leave enough space for your head, torso and legs, and remove objects that could be struck if your grip fails.
- Keep your hands and equipment dry, using a small amount of chalk only when permitted.
Begin with the joint warm-up routine or another general warm-up, then perform easy rows, scapular pulls or assisted pull-ups before attempting demanding holds.
How to Do the Pull-Up Top Hold on Gymnastics Rings
- Set the ring height. Adjust the rings high enough for your feet to clear the floor during the hold while keeping the box within easy reach.
- Stand on the box. Position yourself directly beneath the anchor with one ring on each side of your upper chest.
- Take a secure grip. Wrap your fingers and thumbs around the rings with your palms facing each other, allowing a small amount of natural rotation if it feels more comfortable.
- Move into the top position. Use your legs to raise yourself until the rings are beside your upper chest and your chin is above your hands.
- Organize the shoulders. Keep the shoulders active and away from the ears without forcing them aggressively downward or pinching the shoulder blades together as hard as possible.
- Position the elbows. Keep the elbows strongly bent and directed down toward your ribs rather than flared widely to the sides.
- Keep the rings close. Hold each ring beside the upper chest without allowing the handles to drift forward, outward or to different heights.
- Brace the body. Tighten your abdominals and glutes, bring your legs together and keep your ribs and pelvis controlled.
- Remove your feet. Gradually transfer your weight into the rings, lift your feet from the box and wait until any movement has stopped before starting the timer.
- Maintain the hold. Keep your chin above your hands, your rings close and your body still while taking controlled breaths.
- End the attempt when form changes. Stop the timer when the chin drops below the hands, an elbow begins opening, the rings separate or your body starts swinging.
- Exit safely. Return your feet to the box before relaxing your arms or releasing the rings.
How to Do the Pull-Up Top Hold on a Bar
- Place a stable box beneath a securely mounted pull-up bar.
- Stand on the box and take an approximately shoulder-width overhand grip with your thumbs wrapped around the bar.
- Use your legs to position your chin clearly above the bar without pressing your throat or chest against it.
- Drive your elbows down toward your sides and maintain an active, controlled shoulder position.
- Brace your abdominals and glutes, keep your legs together and remove your feet from the box.
- Begin timing only after your body has stopped moving and maintain the position without kicking, swinging or craning your neck.
- Stop the hold as soon as the lower edge of your chin reaches bar height or any other completion standard is lost.
- Step back onto the box before releasing the grip.
Pull-Up Top Hold Completion Standard
A valid hold should meet all of the following criteria:
- The athlete enters the position under control rather than using a jump or kip.
- Both feet remain clear of the floor, box and surrounding equipment.
- On rings, the chin remains above the hands and the rings stay beside the upper chest.
- On a bar, the lower edge of the chin remains clearly above the top of the bar.
- The neck stays approximately neutral instead of reaching upward to create artificial height.
- Both elbows remain strongly flexed without one side gradually straightening.
- The shoulders remain actively controlled and do not collapse toward the ears.
- The trunk and legs remain quiet without kicking, kipping or deliberate swinging.
- The forearms do not press into the ring straps for additional support.
- The timer stops immediately when any height or body-control standard is lost.
Breathing During the Hold
Take a breath and brace before removing your feet, then use small, controlled breaths while maintaining trunk tension. Avoid holding your breath for the entire attempt, particularly during longer sets. If breathing causes you to lose the position, use a shorter hold or more assistance rather than continuing with deteriorating form.
Common Pull-Up Top Hold Mistakes
- Jumping into the position: A forceful jump creates swinging and makes the start of the hold difficult to standardize, so use a box and transfer your weight gradually.
- Starting the timer too early: Begin timing only after your feet are clear and any initial movement has stopped.
- Reaching with the chin: Keep the head neutral and elevate the torso instead of extending the neck to appear higher.
- Allowing the shoulders to shrug: Maintain active shoulder tension so the torso does not sink while the chin remains momentarily high.
- Flaring the elbows: Direct the elbows down toward the ribs to keep the rings or bar position controlled.
- Letting the rings separate: Reduce the hold duration or use assistance if you cannot keep both handles close to the upper chest.
- Arching excessively: Keep the ribs controlled and the glutes engaged rather than creating height by extending the lower back.
- Bracing against the straps: Keep the forearms clear enough that the straps do not support the position.
- Continuing after the standard is lost: Record only clean seconds and finish before fatigue turns the hold into a slow uncontrolled descent.
- Dropping at the end: Return to the box or perform a controlled negative instead of suddenly releasing from a fatigued position.
Benefits of the Pull-Up Top Hold
- Develops top-range pulling strength: The exercise directly loads the elbow and shoulder positions required to finish a strict pull-up.
- Builds bent-arm endurance: The lats and elbow flexors must maintain tension without assistance from momentum.
- Improves completion awareness: A clearly defined hold teaches the difference between raising the torso and merely lifting the chin.
- Strengthens the grip: The hands and forearms support the complete bodyweight throughout the attempt.
- Develops ring control: The ring version requires both handles to remain level and close to the torso.
- Prepares controlled negatives: The same box entry can be followed by a slow descent into a negative ring pull-up.
- Provides measurable progression: Clean hold duration can be recorded and compared between training sessions.
How the Exercise Fits Into Pull-Up Progressions
The pull-up top hold primarily addresses the final portion of a pull-up. It does not directly train scapular initiation from straight arms or strength throughout the entire middle range, so combine it with assisted full-range repetitions, rows, scapular pulls and controlled negatives.
- Feet-assisted top hold
- Band-assisted top hold
- Unassisted bar top hold
- Unassisted ring top hold
- Top hold followed by a controlled negative
- Three-position isometric pull-up holds
- Strict full-range pull-ups with a brief top pause
The standalone top hold and three-position hold should remain separate canonical exercises. The former isolates one completion position and is suitable earlier in the progression, while the latter combines top, middle and active-bottom holds within one sequence.
Does It Help With Muscle-Ups?
The exercise develops useful bent-arm strength, but a standard chin-level hold is not a complete muscle-up preparation exercise. A bar muscle-up requires substantially greater pulling height and often explosive acceleration, while a strict ring muscle-up normally requires a false grip, a deeper pull and a coordinated transition.
For ring muscle-up-specific training, progressively bring the rings lower beside the chest, practise the ring false-grip hang and develop the ring muscle-up transition. Treat a deep false-grip hold as a harder variation of this exercise unless you later decide to build a dedicated muscle-up high-pull database.
How to Program Pull-Up Top Holds
Perform the hold early in a pulling workout after warming up but before your grip and elbow flexors are fatigued. The following are practical starting guidelines rather than universal strength standards:
- Initial practice: Perform three to five sets of three to eight clean seconds.
- Strength-endurance work: Perform three to four sets of eight to twenty clean seconds.
- Rest: Take approximately 90 to 180 seconds between demanding full-bodyweight holds.
- Frequency: Begin with one or two sessions per week alongside full-range pulling exercises.
- Progression: Add two to five seconds only when the same height and body position can be maintained.
Track the equipment, grip, assistance and clean hold duration. A fifteen-second bar hold and a fifteen-second ring hold are not necessarily identical performances, so compare repeated attempts made with the same setup.
If your primary goal is your first complete repetition, incorporate the hold into the six-week pull-up workout plan rather than relying on top-position work alone.
Safety and Discomfort Guidance
- Inspect the bar, anchors, straps, buckles and platform before supporting your bodyweight.
- Use a box that cannot slide, tilt or collapse during entry and exit.
- Build duration gradually instead of testing a maximum hold during every session.
- End the set before fatigue prevents you from returning safely to the box.
- Do not continue through sharp or increasing shoulder, elbow, wrist or hand pain.
- Stop immediately if you experience numbness, tingling, instability or an uncontrolled loss of grip.
- Seek assessment from an appropriately qualified healthcare professional if symptoms persist or affect normal activity.
Frequently Asked Questions
Is a pull-up top hold the same as a flexed-arm hang?
They usually describe the same basic exercise. “Flexed-arm hang” is commonly associated with bar-based fitness tests, while “pull-up top hold” more clearly identifies its role within a pull-up progression.
Should rings and a pull-up bar have separate exercise pages?
No. The apparatus changes the grip and stabilization demands, but the top-position objective, muscles trained and method of progression remain similar enough for one canonical page.
How high should I hold myself?
On a bar, keep the lower edge of your chin clearly above the bar. On rings, keep your chin above your hands with the handles beside your upper chest.
Do I need a false grip on rings?
No. Use a normal neutral grip for the standard exercise and reserve the false grip for athletes specifically preparing for strict ring muscle-ups.
Can I train this exercise if I cannot perform a pull-up?
Yes. Use a box to enter the top position and add foot or band assistance if you cannot yet maintain your full bodyweight with clean form.
How long should I hold the position?
Start with repeatable holds of approximately three to eight seconds and gradually work toward ten to twenty seconds without losing height or body control.
Will top holds give me my first pull-up?
They can strengthen the final portion of the movement, but you should also train the bottom, middle and controlled lowering phases through assisted pull-ups, rows and negatives.
Why do the rings keep swinging?
You may be entering too quickly, using unequal strap lengths or losing trunk tension, so reset on the box and transfer your weight into the rings more gradually.
What is the difference between a pull-up top hold and a high pull-up?
A pull-up top hold is a stationary chin-over-hands or chin-over-bar position, whereas a high pull-up is a dynamic exercise that raises the chest, abdomen or waist toward the bar.
When should I progress to a harder variation?
Progress when you can repeat the prescribed duration while maintaining the same height, grip, ring position and body control across every set.
Tips for the proper execution of Pull-Up Top Hold
Use a stable box to enter the hold so your timed effort measures top-position strength rather than the energy spent pulling up.
Set both rings to exactly the same height before every attempt.
Use a neutral ring grip and allow the handles to rotate only as much as needed for wrist comfort.
Keep the rings beside your upper chest instead of letting them drift in front of your face.
Direct your elbows down toward your ribs rather than flaring them widely.
Keep your neck neutral and raise your torso instead of reaching upward with your chin.
Brace your abdominals and glutes to keep your lower body quiet.
Begin timing only after your feet are clear and all swinging has stopped.
Take controlled breaths instead of holding your breath for the entire attempt.
Stop the timer as soon as your chin, elbows, shoulders or rings lose the completion standard.
Record only clean hold time performed with the same equipment and grip.
Return your feet to the box before relaxing your arms or releasing the equipment.
Muscles worked when doing Pull-Up Top Hold
The pull-up top hold primarily challenges the lats and elbow flexors, while the upper back, grip and trunk maintain the top position. The exact contribution of each muscle changes slightly with grip, equipment and how deeply the rings or bar are pulled toward the torso.
Primary Muscles
- Latissimus dorsi: The lats maintain the upper arms close to the torso and resist the body lowering from the top position.
- Biceps brachii: The biceps maintain strong elbow flexion and contribute to forearm control throughout the hold.
- Brachialis: The brachialis supports elbow flexion regardless of whether the hands are pronated, neutral or slightly supinated.
- Brachioradialis: The brachioradialis assists the elbow flexors and is particularly relevant during neutral and overhand grips.
Secondary and Stabilizing Muscles
- Trapezius and rhomboids: These upper-back muscles control the shoulder blades and help prevent the torso from sinking.
- Teres major: The teres major assists the lats in maintaining the upper-arm position.
- Rear deltoids: The rear deltoids assist shoulder extension and stabilize the upper arms.
- Rotator-cuff muscles: These muscles stabilize the upper-arm bones, particularly while the rings move independently.
- Forearm and hand muscles: The finger and wrist muscles maintain a secure grip for the complete hold.
- Abdominals and obliques: The trunk muscles limit swinging, rotation and excessive spinal extension.
- Glutes and spinal stabilizers: These muscles help keep the pelvis and lower body controlled beneath the equipment.
Primary Muscle(s):

Biceps

Lats
Secondary Muscle(s):
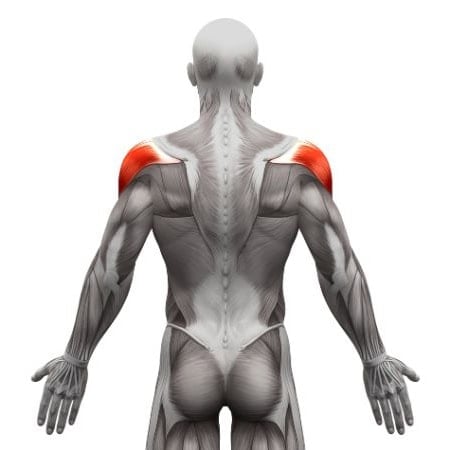
Rear delt
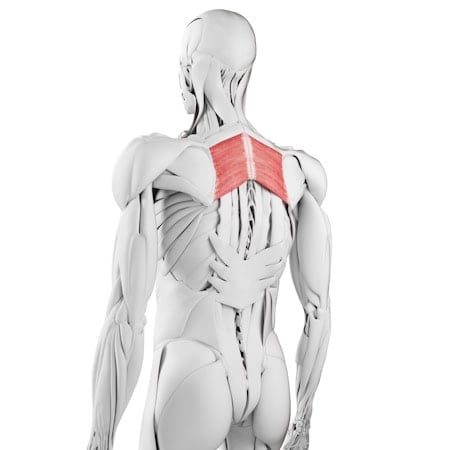
Rhomboid

Trapezius
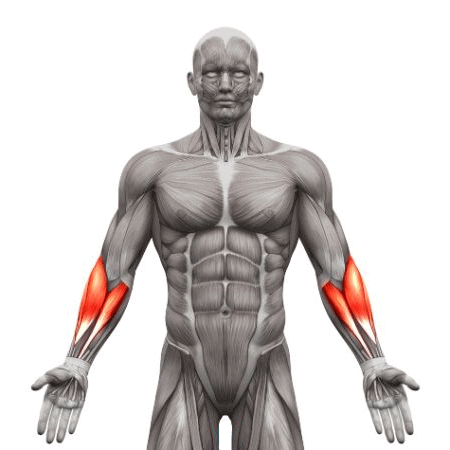
Forearm

Abdominal
Equipment needed for Pull-Up Top Hold
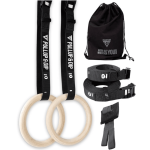
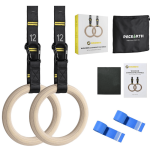
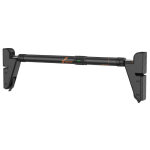
Adjust the difficulty of Pull-Up Top Hold
How to make Pull-Up Top Hold harder?
How to make Pull-Up Top Hold easier?
How to make Pull-Up Top Hold harder?
To make Pull-Up Top Hold harder:
-
Increase the hold duration in two- to five-second increments while preserving the same completion standard.
-
Wear a light weighted vest or use a dip-belt load without allowing the added weight to create swinging.
-
Finish each hold with a controlled three- to five-second negative.
-
Pull the rings farther down beside the chest to develop a deeper high-pull position.
-
Use a false grip on the rings when your specific goal is a strict ring muscle-up.
-
Shift a small and controlled amount of bodyweight toward one arm while the opposite arm continues to assist.
-
Progress to the ring-assisted one-arm pull-up and include a brief pause at the top of each repetition.
-
Combine top, middle and active-bottom positions in three-position isometric pull-up holds.
How to make Pull-Up Top Hold easier?
To make Pull-Up Top Hold easier:
-
Keep one or both feet lightly on a box and use only enough leg pressure to maintain the correct top position.
-
Loop a resistance band around the equipment and support a foot or knee to reduce the bodyweight held by the upper body.
-
Practise on a fixed pull-up bar before using rings if independent ring movement prevents you from holding still.
-
Begin with three-second holds and accumulate several clean attempts instead of performing one maximum-duration hold.
-
Use a higher box so you can establish the top position without spending energy climbing or jumping into it.
-
Perform feet-assisted ring pull-ups with a brief top pause before attempting a completely unsupported hold.
